If you’re hiring a graphic designer, don’t wait until the project starts to figure out what you need. You should have the key files, decisions, and details ready before you hand over the brief.
Otherwise, your designer has to chase missing information while you’re already paying for their time. A missing logo file here or an undecided colour palette there can lead to delays, extra revisions, and a brief nobody fully understands.
So, what should you prepare before you hire a graphic designer? Here’s a simple graphic design checklist covering the eight files and decisions to have ready:
- Your budget
- Your target audience
- Your brand guidelines
- Your logo files
- Your colour palette
- Your design references
- Your content and copy
- Your deadline
Having these ready gives your designer a clearer starting point and helps the project move forward with fewer unnecessary revisions. Let’s look at each one.
1. Define Your Project Scope
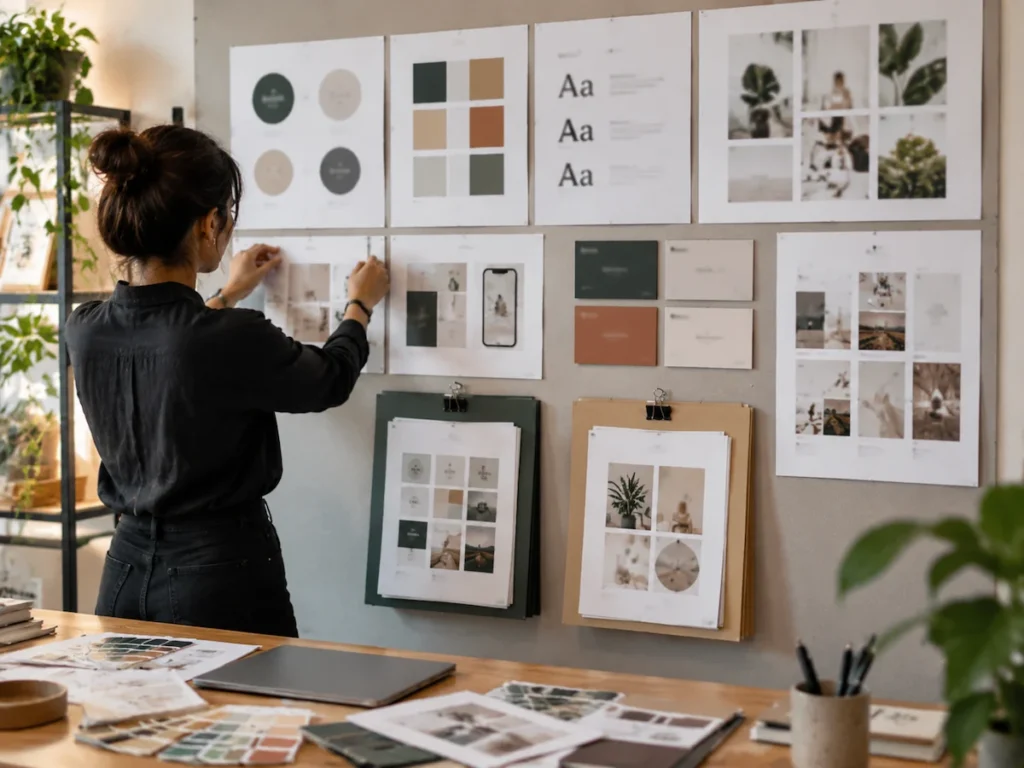
Let’s say you find a graphic designer with years of experience and a portfolio you love. You hire them to create your new brand identity and assume you’ve covered the important details.
A few weeks later, you realise you’re talking about a full brand package. They’re working on a logo and colour palette. You expected social media templates, business cards, and a presentation deck too.
Neither of you necessarily made a mistake. You simply started the project with different ideas about what the job included.
That’s why your project scope needs to be clear before the designer starts. Write down exactly what you need, which items are included, and when you expect each one.
For example, your scope might include:
- Logo and variations
- Colour palette and typography
- Social media templates
- Business card design
- Presentation deck
Also state what falls outside the project. If you need extra designs later, you and your designer can treat them as additional work rather than debate whether they were part of the original agreement.
2. Identify Your Target Audience
It’s a no-brainer: your designer needs to know who the design is for. Yet many businesses skip this step and start talking about colours, fonts, and layouts instead.
The problem is, a design that looks great to you isn’t necessarily right for your audience. A playful typeface might work for a children’s brand but feel out of place for a law firm. A bold, experimental layout might attract one audience and push another away.
So don’t give your designer a vague description like “business owners aged 30 to 50.” Tell them what those people care about, where they look for solutions, how they view your brand, and what might persuade them to buy.
The more your designer knows about the people they’re designing for, the less they’ll have to guess about what will resonate.
3. Decide on Your Deliverables
You might get the best design you’ve seen all year. But if you and your designer haven’t agreed on exactly what you’re getting, you could still end up disappointed.
Maybe you expected an editable file, but received a finished PDF. Or you assumed your quote covered three design concepts and unlimited revisions, only to find out it included one concept and two rounds of changes.
So before you request a quote, decide what each deliverable needs to include. Think about where you’ll use the design and which file formats you’ll need:
- Print materials often need PDF or EPS files.
- Websites may need SVG or PNG files.
- Social media graphics need specific dimensions for each platform.
- Presentations might require editable PowerPoint or Keynote files.
Then agree on the number of concepts and revision rounds included in the project. One concept keeps the scope tight. Two or three gives you more options to compare. More revision rounds give you more room to refine the chosen direction.
Put these details in the brief before you sign anything. You’ll know exactly what you’re paying for, and your designer will know exactly what they’re expected to deliver.
4. Set Your Budget

Now that you know what you want the designer to deliver, there’s one question to settle before comparing designers: how much are you prepared to spend?
You don’t need an exact figure down to the last dollar. But you should have a realistic range in mind. Otherwise, you might ask for more work than your budget supports or waste time considering designers outside your price range.
For some context, the U.S. Bureau of Labor Statistics reports a median annual wage of $62,960 for graphic designers as of May 2025. Freelance project prices vary widely, though, because designers price based on factors such as experience, scope, deliverables, and location.
If you’re not sure what a reasonable budget looks like, use these ranges as a starting point:
| Budget range | What it might cover |
|---|---|
| $300–$800 | Logo design with a few final file formats |
| $800–$2,500 | Logo plus a basic brand guide |
| $2,500 | Broader identity work with multiple brand assets |
Use these figures as a starting point rather than a fixed price list. Remember, your deliverables, designer’s experience, and project requirements should ultimately determine where your budget falls.
5. Set Your Timeline
Before you hire a graphic designer, decide when you need the work finished. Your deadline affects which designers are available, how much time they have to work on the project, and which pricing model makes sense.
Some designers charge by the hour. Others work on a fixed project fee. Hourly pricing often suits projects where the scope is still evolving. If you already know exactly what you need, a project-based fee gives you a clearer idea of the total cost from the start.
Your timeline also needs to leave enough room for the work itself. A logo might take around two weeks, while a full visual identity could take several weeks or more, depending on the scope and revision rounds.
Once you have a realistic timeframe in mind, set your target completion date before you request quotes. Then work backward and allow time for concepts, feedback, revisions, and final file preparation. Add the deadline to your brief alongside your budget so every designer is quoting against the same expectations.
6. Gather Your Brand Files
This is one of the most important things to prepare before your designer starts. The last thing you want is to review the first concept and realise they’ve been working with an outdated logo or the wrong brand colours.
To avoid that, give your designer the source files and brand assets they need from the start. Gather:
- Your current logo in an editable or vector format
- Brand colours and colour codes
- Brand fonts
- Existing brand guidelines
- Other relevant brand assets
If you’re unsure which file formats to provide, use this as a quick reference:
| Asset | What to provide |
|---|---|
| Logo | SVG, EPS, AI, or another editable format |
| Colours | HEX, RGB, CMYK, or Pantone codes |
| Fonts | Font files or font names and licensing details |
| Brand guidelines | Existing rules for colours, fonts, logos, and usage |
Keep everything in one shared folder rather than sending a dozen email attachments. Your designer should be able to find the latest version of every asset without having to ask which file is the right one.
If a font license doesn’t cover commercial use, flag it before the project starts. Your designer can then help you find a suitable replacement.
7. Collect Design References

Why struggle to describe a design you have in your head when you can show your designer what you mean?
Think about it. If you asked someone to make a logo that feels “modern, premium, but not too corporate,” what would they actually picture? You might be thinking of clean typography and plenty of white space. They might be imagining bold colours, sharp lines, and a completely different typeface.
A few good references can remove that guesswork. Find designs you like and show your designer what catches your eye. It could be the typography, colour palette, layout, imagery, or simply the overall feel.
It’s just as useful to show what you don’t like. If a certain style, colour, or layout is off the table, say so before the designer starts.
You don’t need to find designs that look exactly like the finished product. The goal is to give your designer a clearer picture of the direction you have in mind.
8. Choose Your Brief Format
Even if you’ve worked out what your brief needs to cover, you still need to choose a format. You have three main options:
- Creative Brief: This works well when you need to define the project’s purpose, audience, message, and goals before getting into the practical details.
- Design Brief: Use this when you know what you want the designer to create. It gives them clear requirements to work from, so you can compare proposals and avoid misunderstandings about what’s included.
- Design Brief Template: This is the most flexible option if you want a ready-made structure without building the document yourself. A good template gives you a framework to cover both the creative direction and practical requirements.
If you’re still not sure which format to use, look at examples from Figma and Ziflow. Their brief examples can give you ideas for structuring your own document and deciding which questions to include.
Most project management tools also offer brief templates, so check yours before building one from scratch.
Put Your Graphic Design Brief to Work
Now you’re ready to put your graphic design brief together and give your designer a clear picture of what you need. Use the format that best suits your project, then keep the brief close when you start comparing designers and reviewing proposals.
If you’re still unsure what to include, you can always return to this guide as you build your brief. Use it as a checklist to make sure you’ve covered the details your designer needs before work begins.
Not sure what your project needs? Emaglink can help you review your brief and work out the right scope for your brand identity or design system. Get in touch to discuss your project.